We spent over half of our initial budget on a top of the line power system from Victron Energy. And by we, I mean I. You know what they say about initial budgets anyway, “It’s like that unicorn you thought you saw.. turns out some guy just glued a horn to his pony. Never gonna happen.” One of my favorite sayings.
So, why did I go all out on the power system? I’m a hardware hacker. I like technology. I like fancy technology. And, I like data. The Victron Energy systems give me all of that. They have some really nice features around data logging, internet connectivity, open-source software and so on – not to mention all of their stuff is top notch.
While none of this stuff is completely necessary, Vicaribus is not called Vicaribus for nothing. The ultimate goal of the build is to make Vicaribus one of the smartest buses around, sharing as much of the journey on the interwebs. We’re talking sensors galore, power data, weather data, live cams, etc. (Maybe not live cams)
Here’s a quick list of our system parts:
- 2x 165W eBay solar panels
- 1x 200Ah Victron LiFePO4 Smart Battery w/ BMS 12/200
- Victron Multiplus Compact 12/2000 Inverter/Charger
- Victron MPPT 100/30 Solar Controller
- Victron BMV 702 Battery Monitor
- Victron CGGX Display/Control Panel
- Random amazon.com DC 100A Ammeter
- 0/4, 0/2, 4, 6, 8 and 10AWG wires
- 400 AMP T-fuse
- A/C breaker
- DC fuse box
- other stuff
We actually have very modest power needs in our bus. Certainly not enough to warrant the monies spent. No A/C, a small DC fridge, LED lights, a MaxxAir fan and various things to charge like computers and phones, so this system should be plenty for us.
Our charging options include the 330Ws of solar, the bus’s alternator, or shore power. No generator wanted or needed.
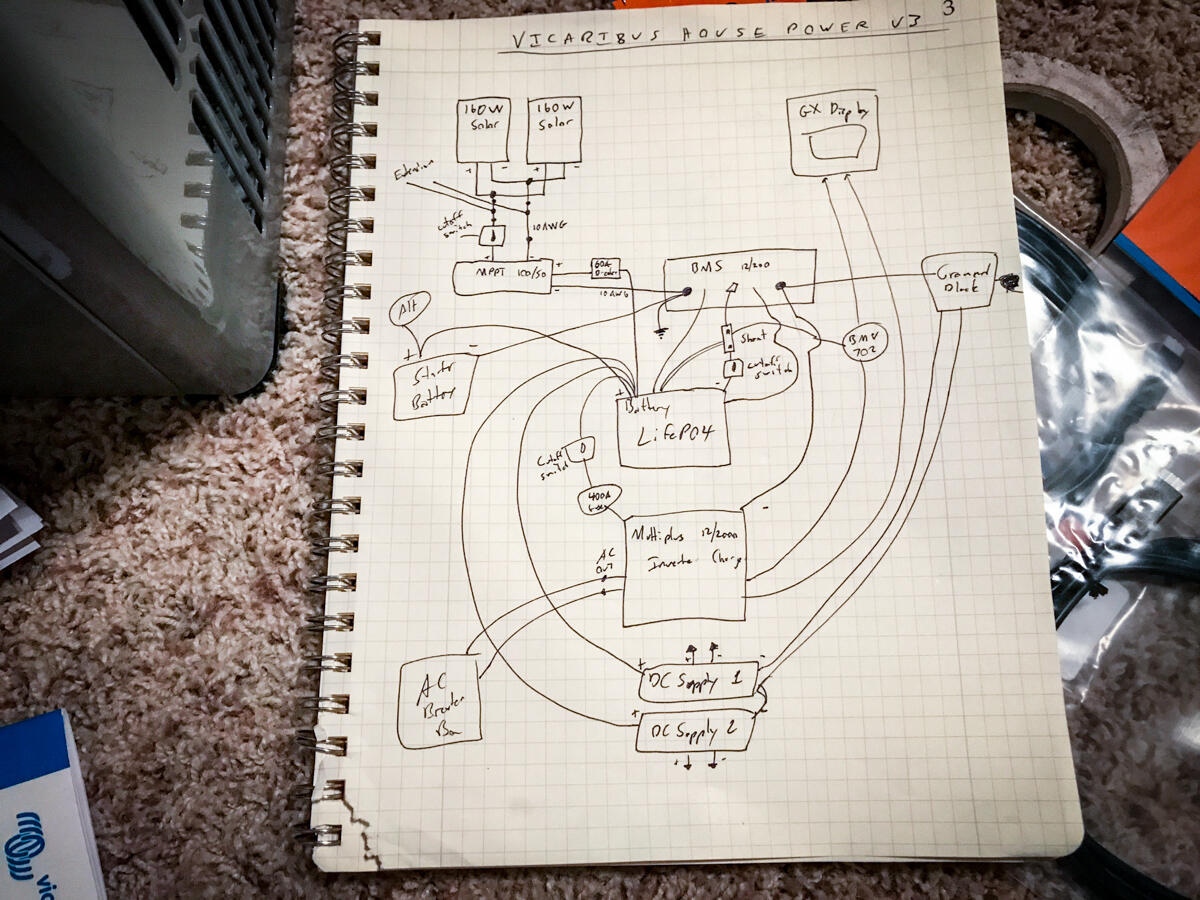
Here’s one of the earlier diagrams of the system. It’s pretty close to accurate.
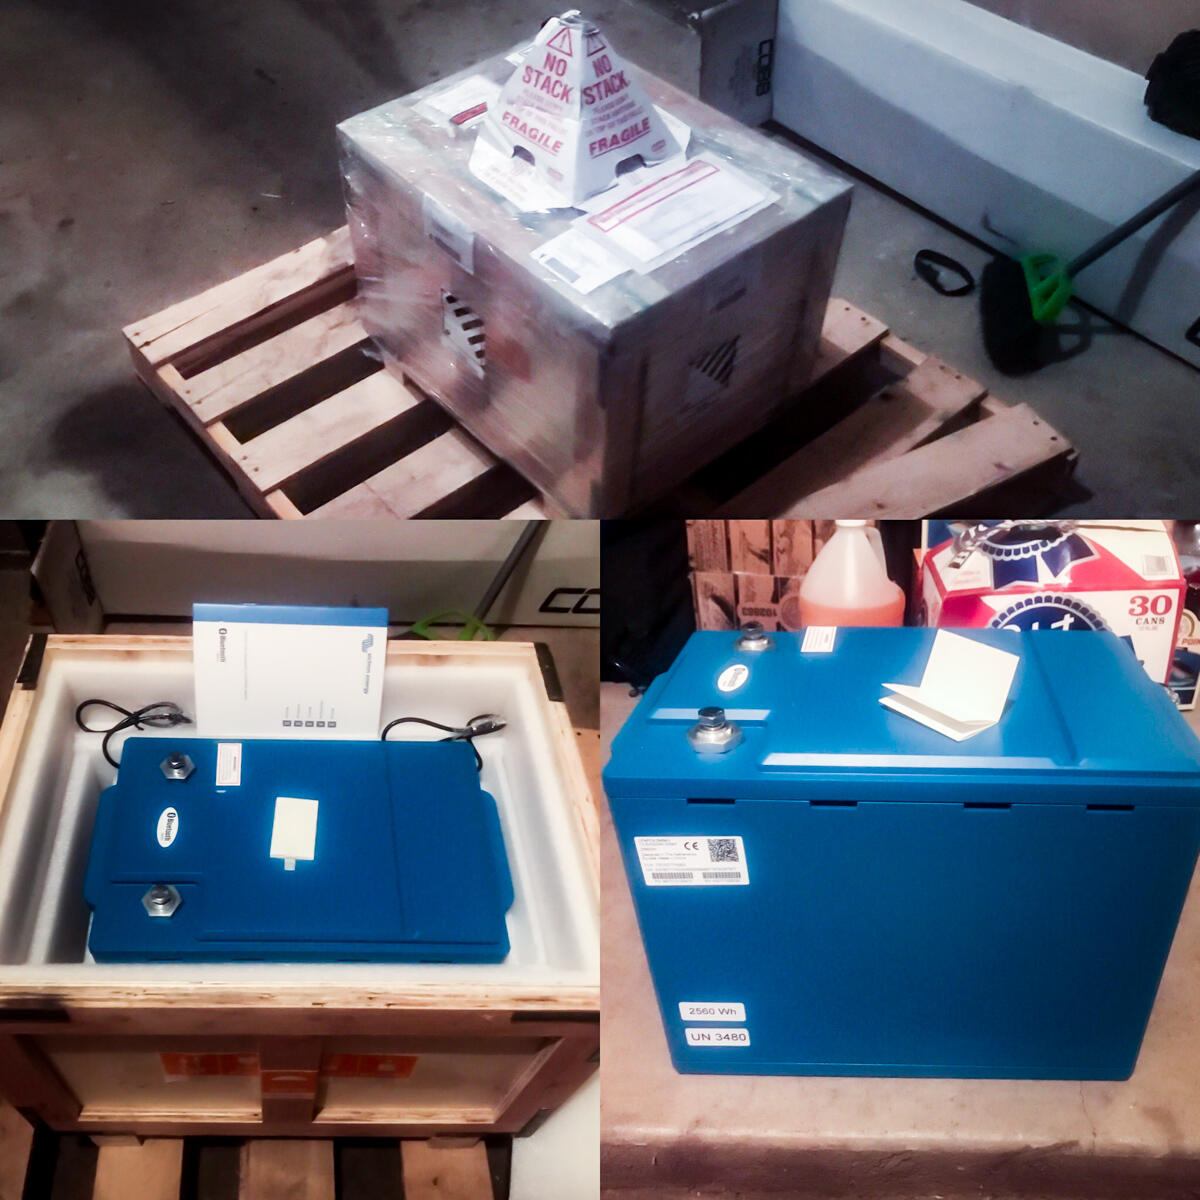
One of my favorite moments was receiving the ~100lb battery via freight, on a crate to my apt door. Here’s the unboxing! I’m not going to go into detail here why we with the super expensive lithium battery, as there is plenty of discussion on that topic to be found in the forums. I will say it is awesome and I’m glad we got it.
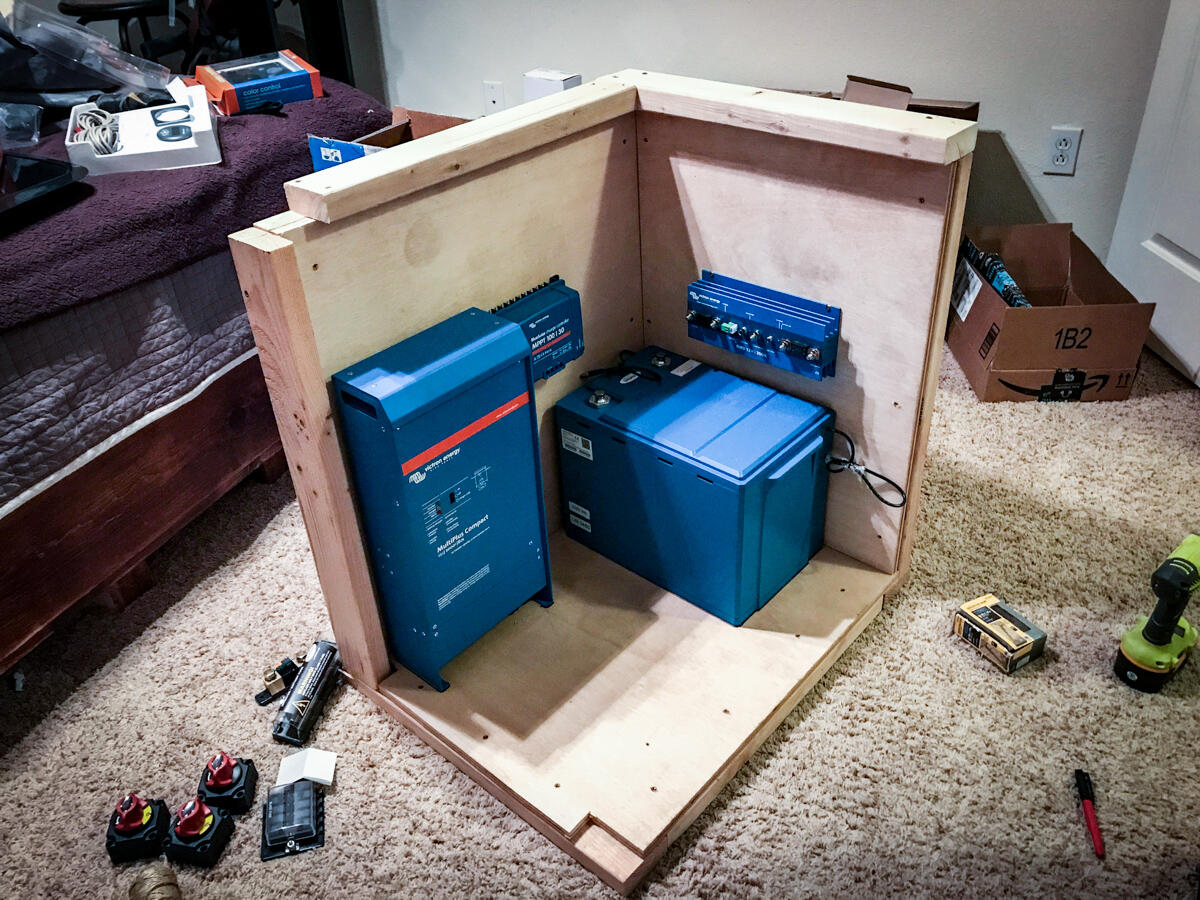
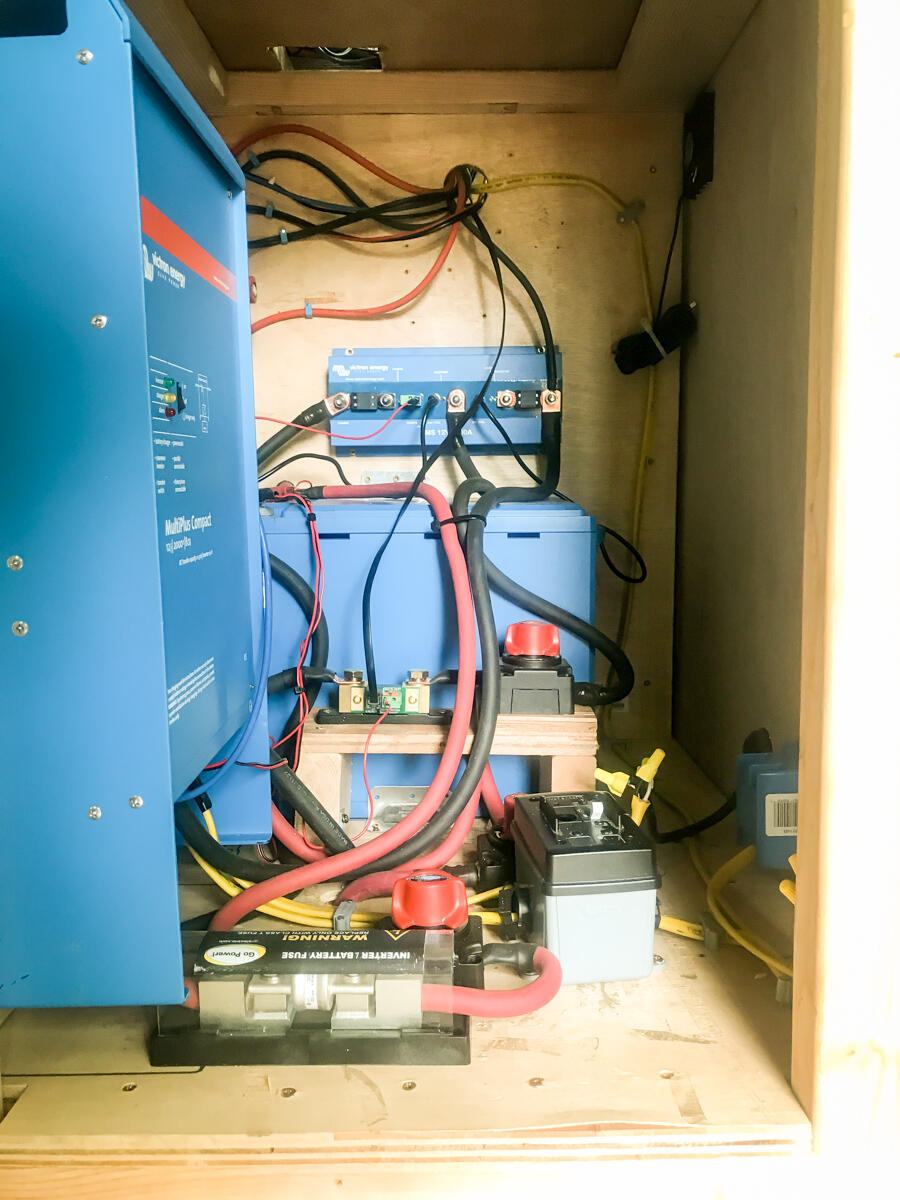
A lot of time (and money), and research (and money) went into DIYing this setup, even with sourcing all of the parts form the same maker. I started out by building a box that I could shove everything into so I could put it all together at home and then drop it into the bus when ready. (The power box lives under our kitchen counter.)
Here is the initial box with the bigger parts placed in it, and prior to any wiring.
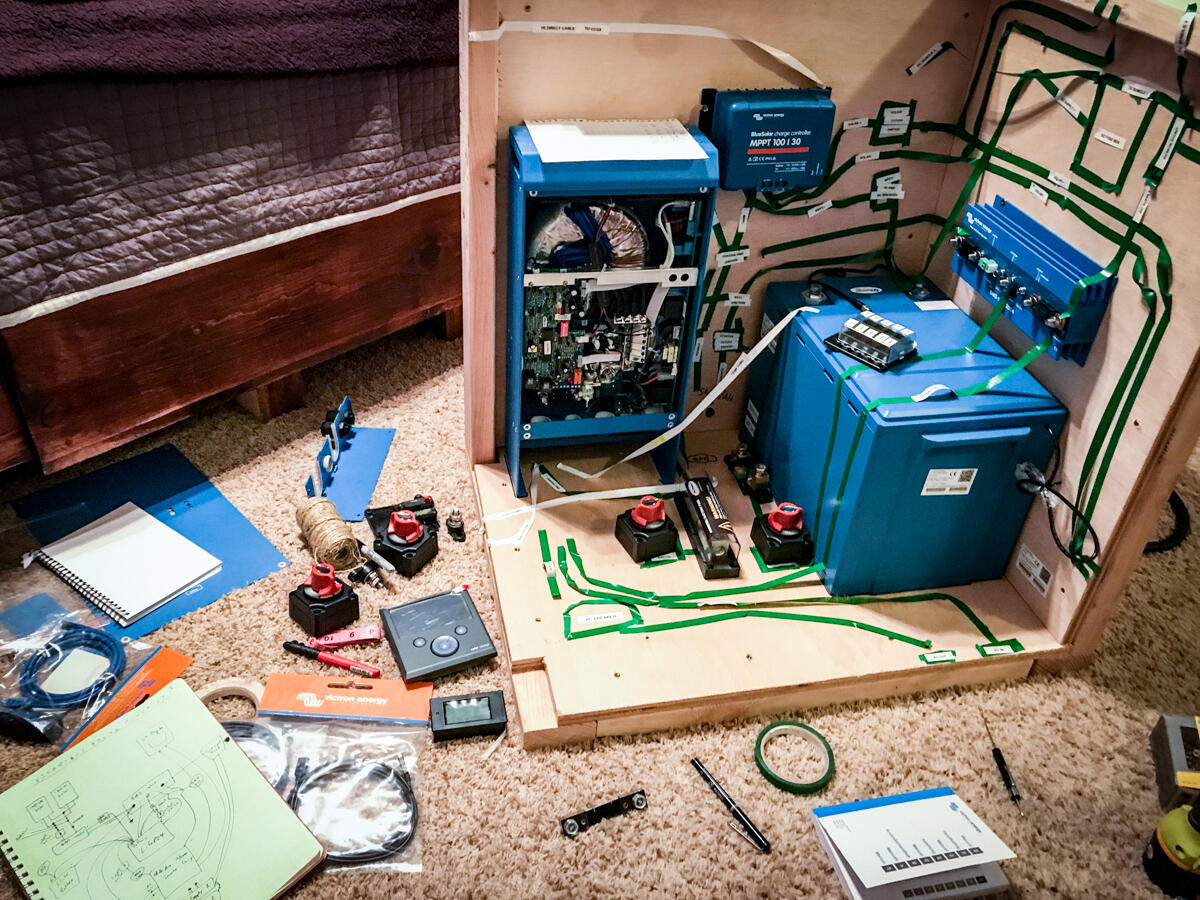
Here is the box with most of the wiring mocked up.
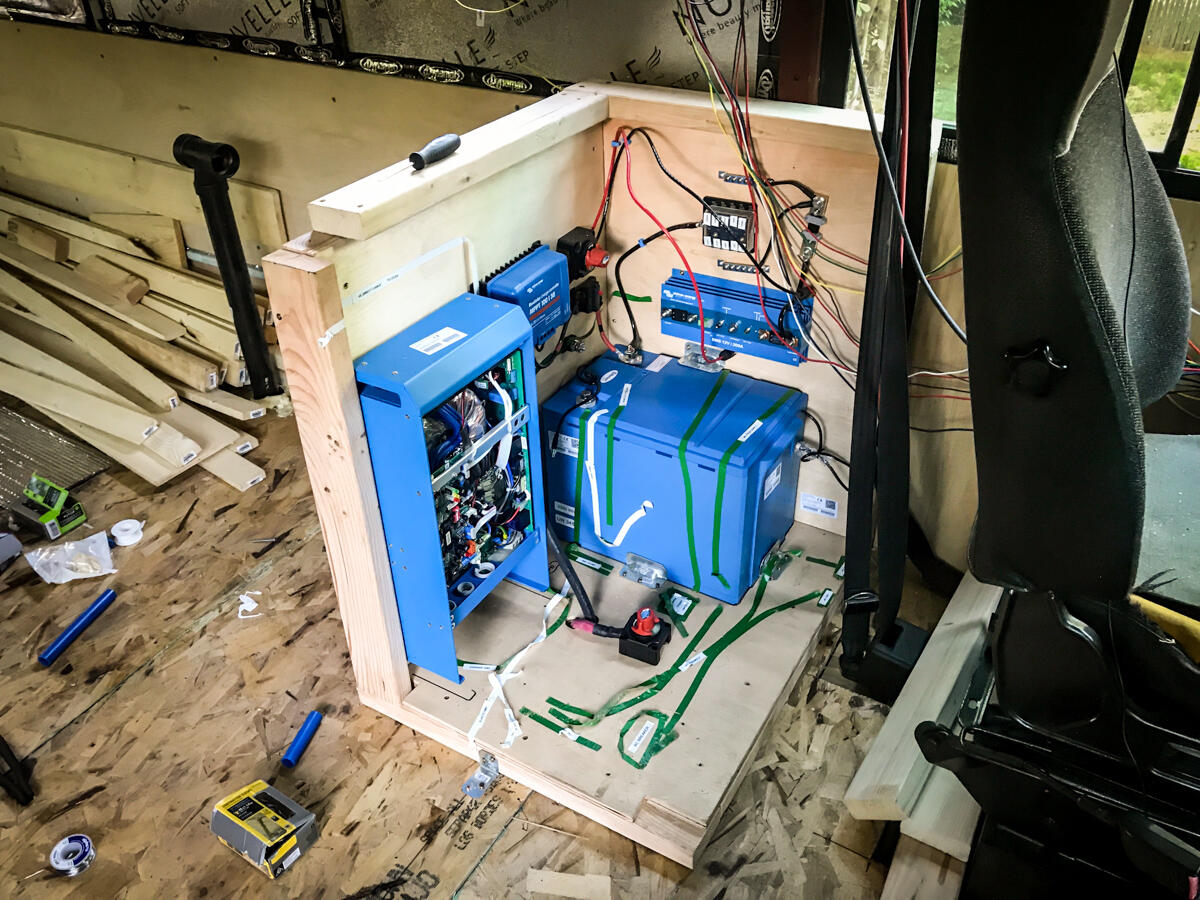
Here is the box being installed in it’s home on the bus.
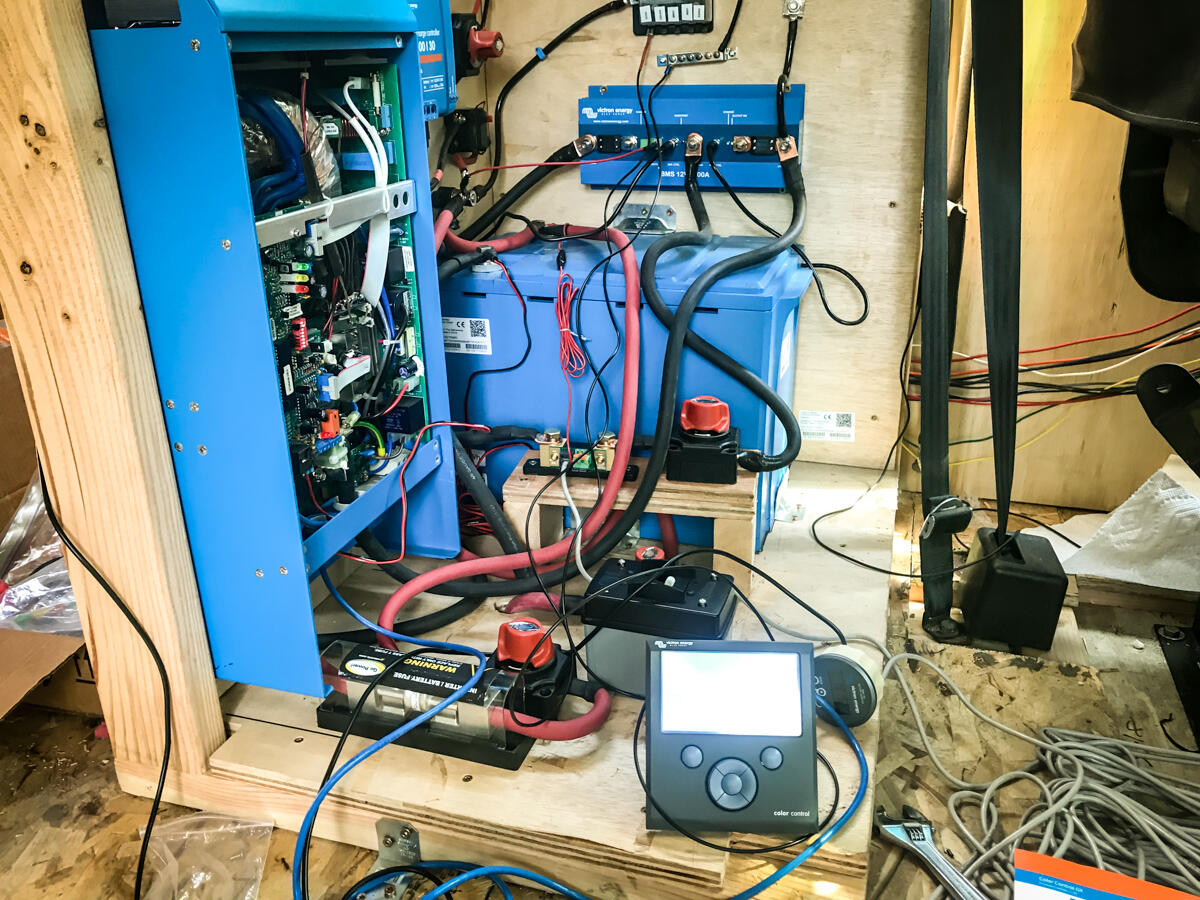
Here it is wired up enough to be turned on for the first time. Big day!
And here it is in it’s final condition! Much cleaner.
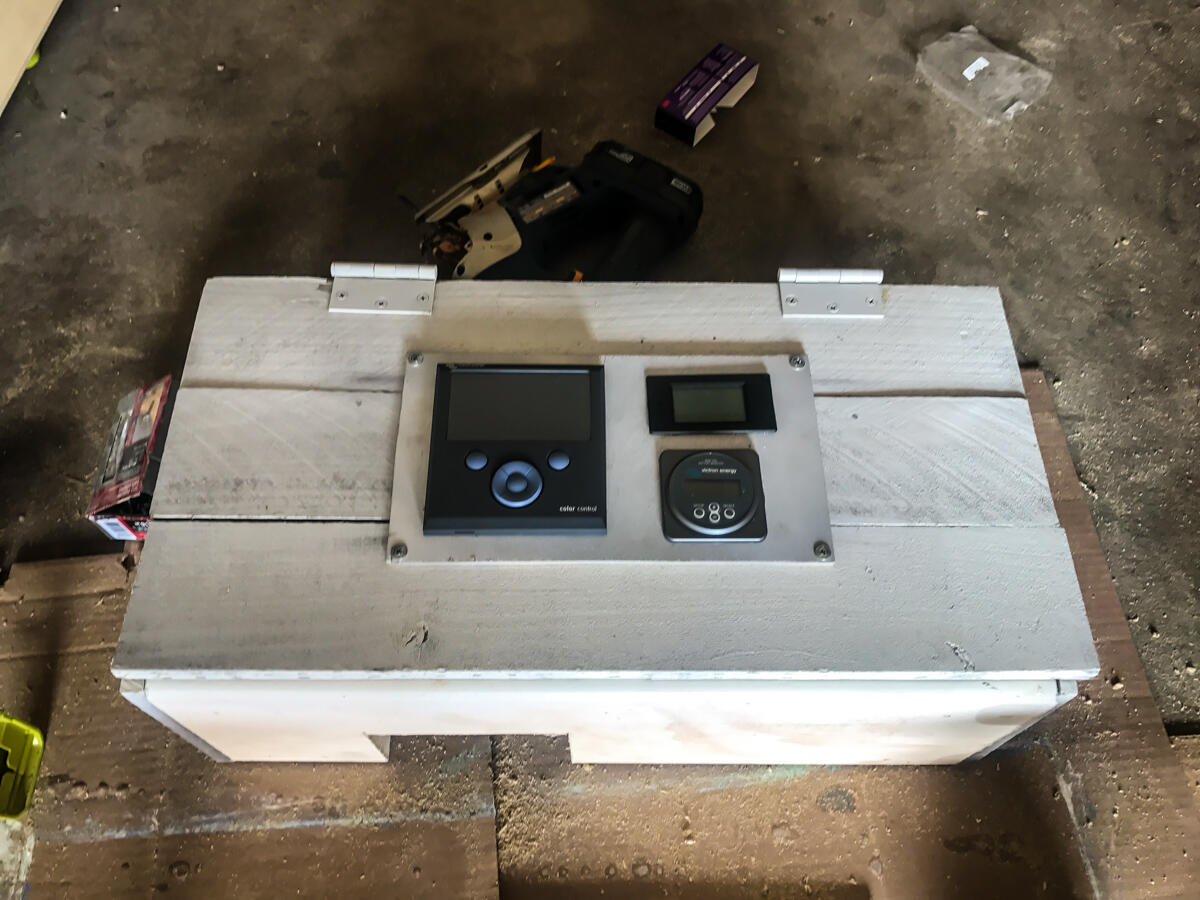
Here’s a nice little box I made with the controls and displays on it. (The box has been removed from the build, the controls shall live elsewhere.)
Here are the solar panels. Had some custom brackets made and used some easy access knobs to secure the panels so that they can be easily moved and/or tilted. Fit like a glove! You can also see the wind gauge, gps sensor and wifi extender base.

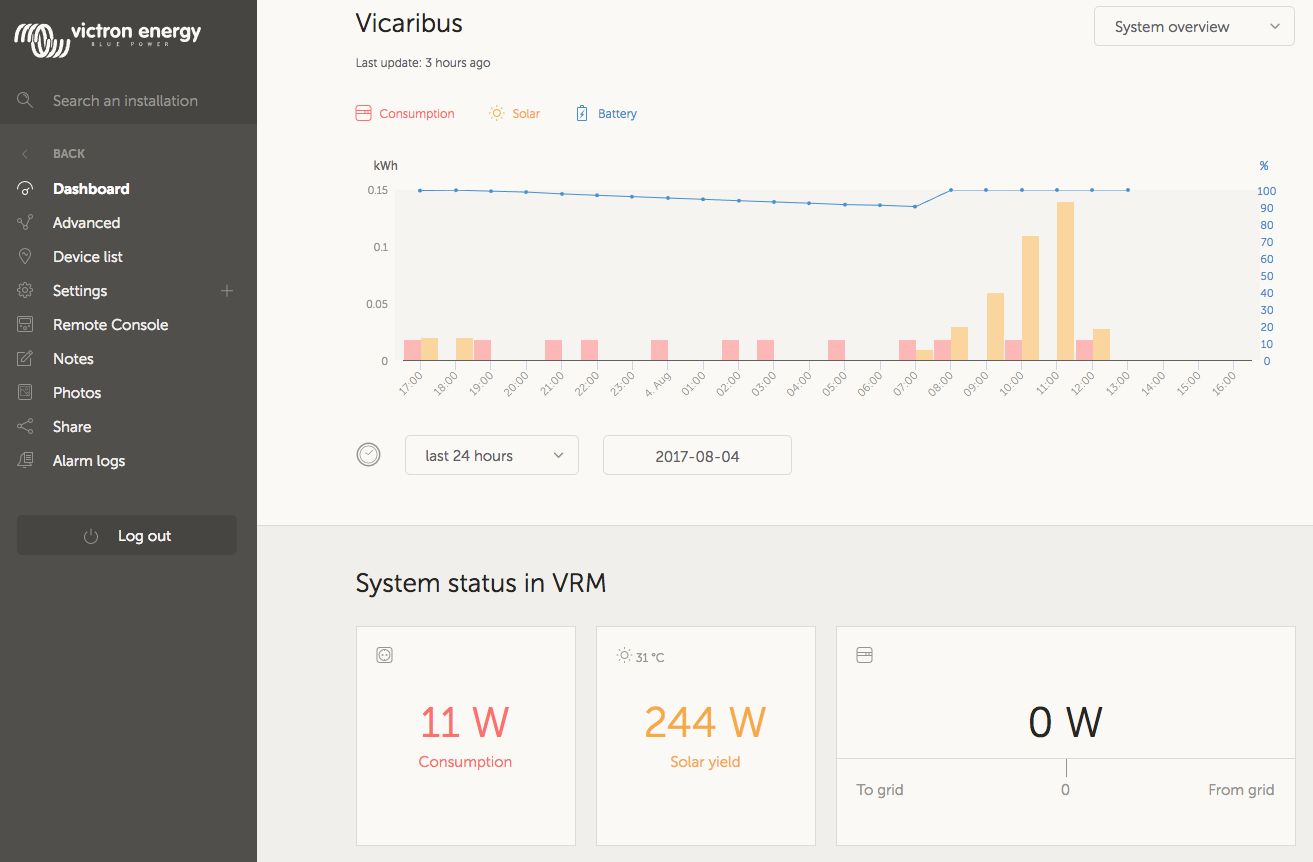
Here’s a view of just some of the system’s data available on the interwebs. (This was today.)