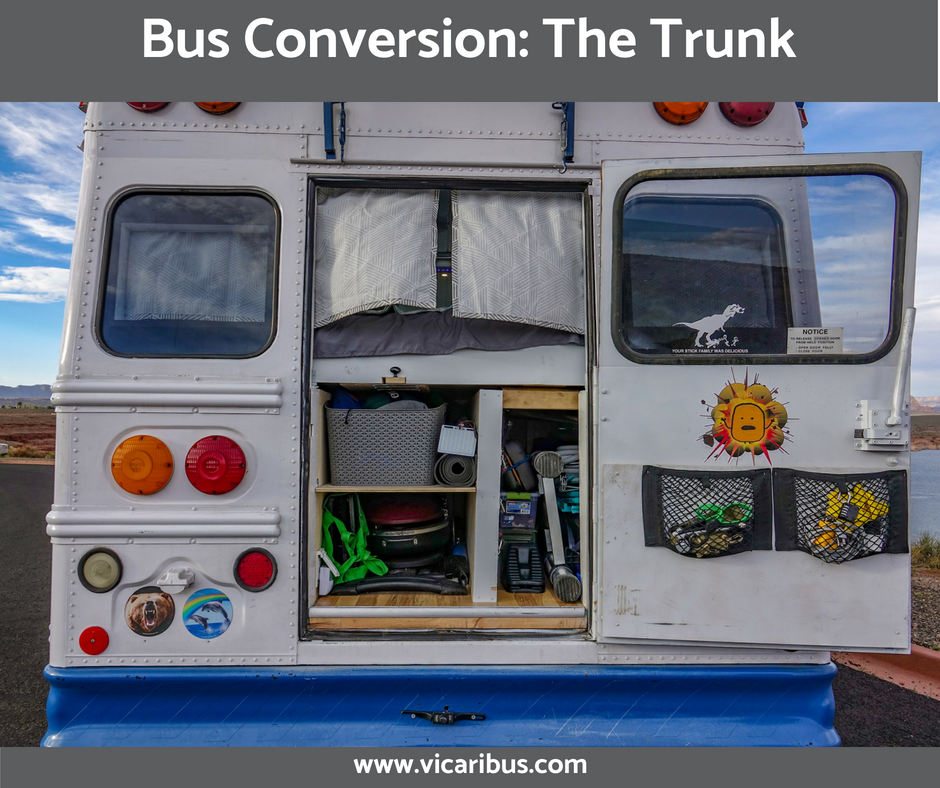
Vicaribus has a lot of junk in its trunk if you know what I mean. And if you don’t, by junk I mean items that serve enough of a purpose that they got chosen to come on our journey. We consider the “trunk” the area of our under bed storage that can be accessed from the back door of the bus. For more information on how we built out the space see our bedroom page.
There are two main areas of the “trunk”, a set of shelves and a big open space. Both of these areas are where we store things that get used outside of the bus which helps keep the inside of the bus sparkly and clean.
Junk in the Trunk
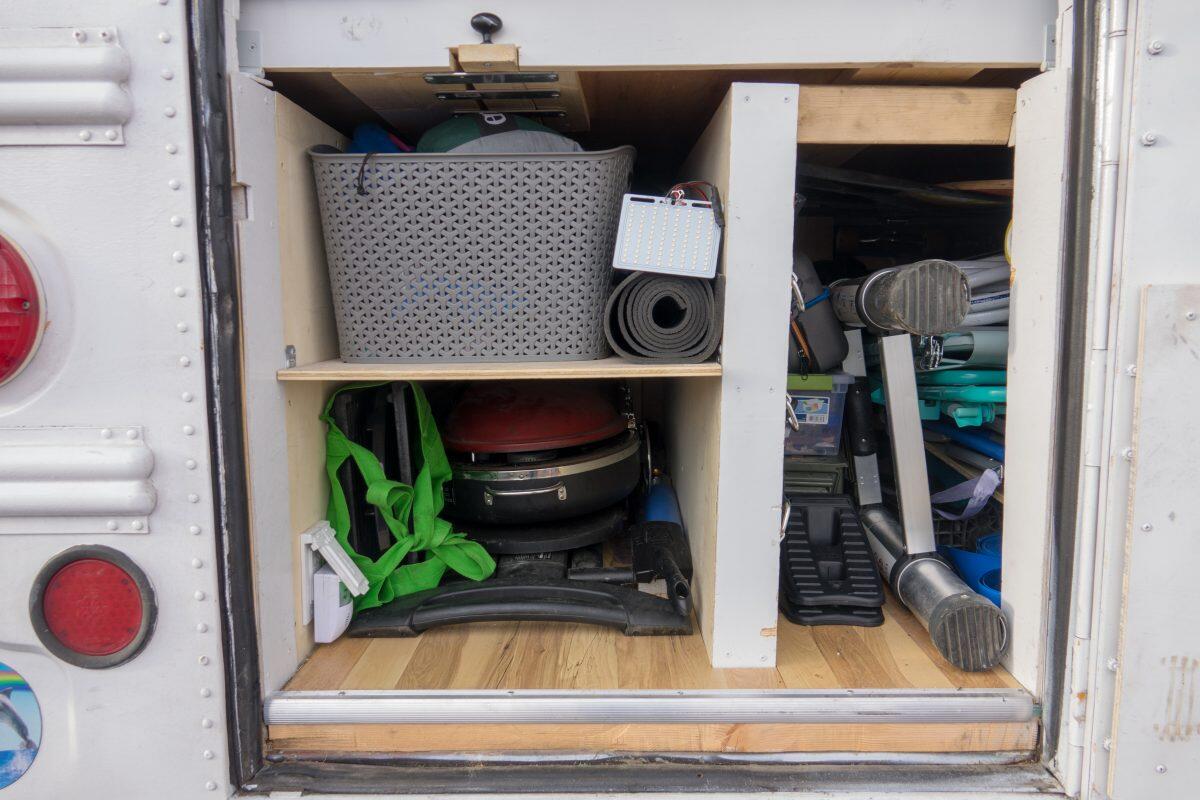
There are two shelves that were created by attaching a piece of plywood to the walls of the frame with L-shaped brackets. The bottom shelf was sized to perfectly fit our collapsible grill (see photo above). Seeing as there is extra space around the sides of the grill, and one cannot waste an inch of storage space in the bus, we also shove all kinds of other things in this section like the water filter, a bucket and a small collection of more often used tools. The downside to shoving more things in there is it makes the grill much more annoying to get out. Although, we have learned that playing Tetris with storage is an almost hourly activity with bus life.

The Grill Compartment in Real Life (I Swear it’s in There)
The second shelf has three different bins that we found at Target and happen to be the perfect size. We originally talked about this shelf being on a slide to make it easier to access the back bins, but by this point in the build laziness struck and we went with a normal shelf. To get to the back bins you have to pull out the front bins, or you can reach it from the inside of the bus by lifting up the bed.
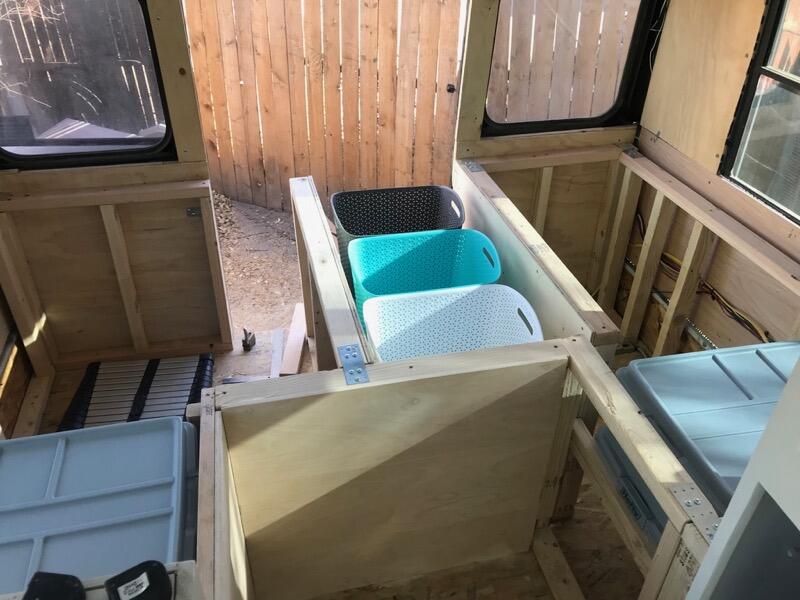
Bins on Shelf Mid Build
The first bin holds our most used outdoor equipment – our hammocks and hammock straps, picnic blanket, shade canopy and a quick drying towel.
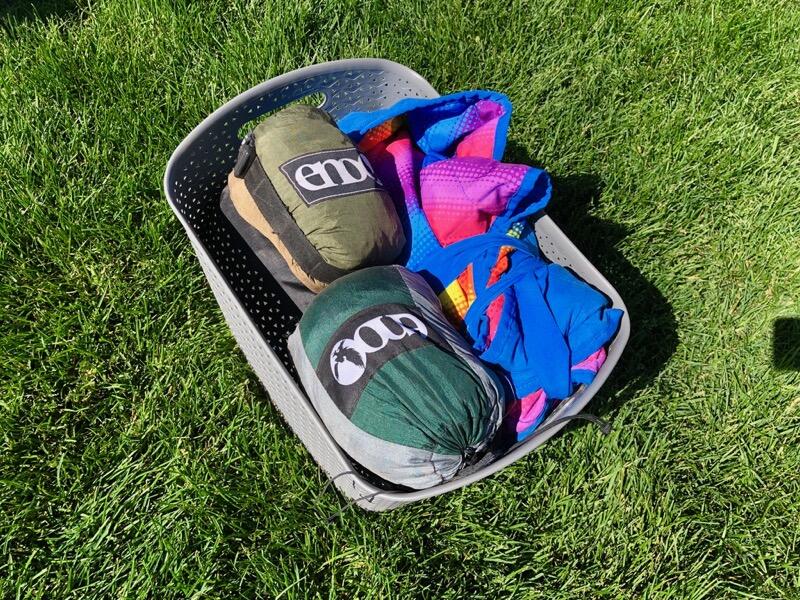
Most Used Bin
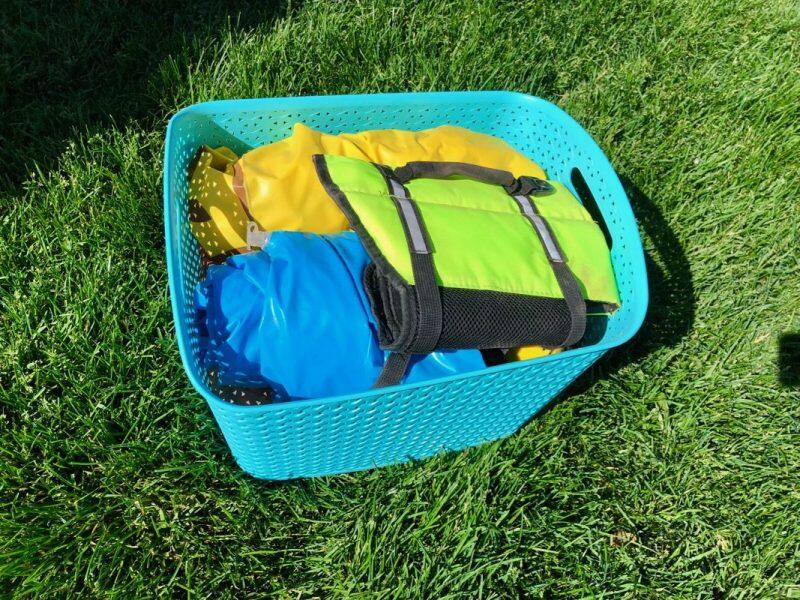
The second bins holds all of our water stuff – tubes, air pump, Miles’ life jacket and our inflatable T-rex costume (can’t leave home without it).
Water Bin
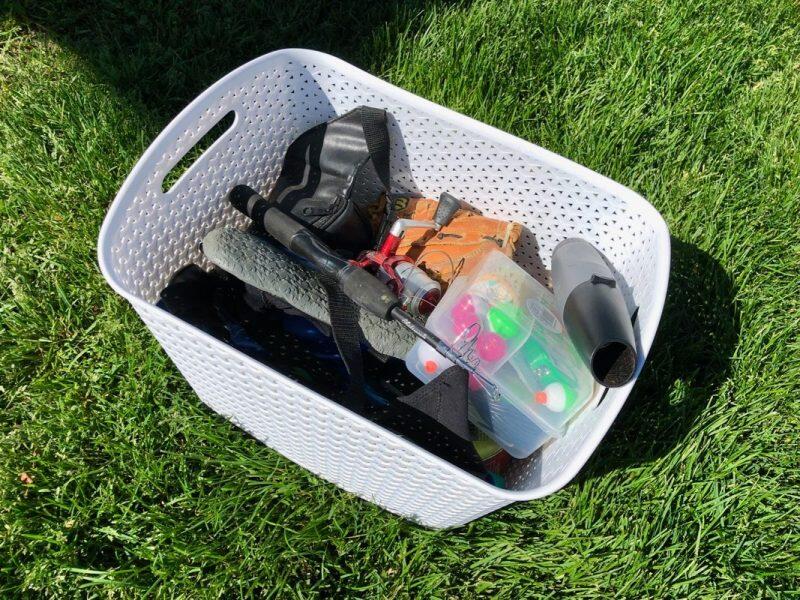
The third bin is all the miscellaneous stuff that doesn’t get used much – tackle box and fishing pole, baseball mitt, fire blower, small cooler and who knows what else.
Random Bin
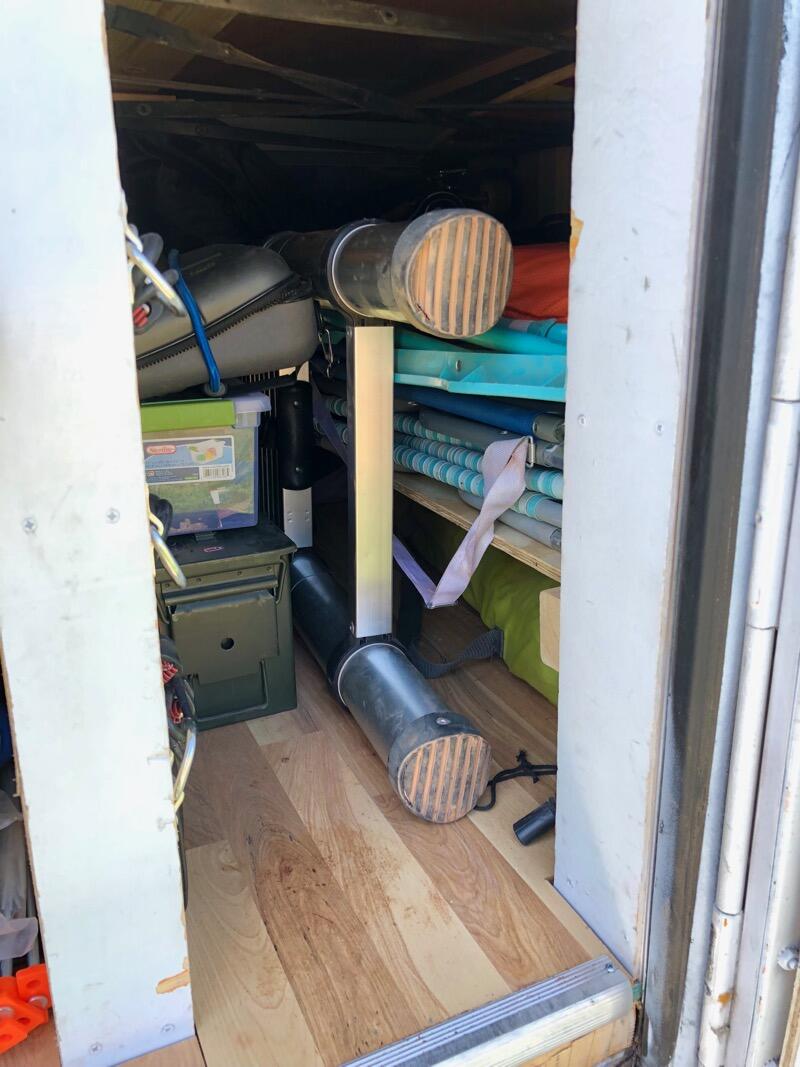
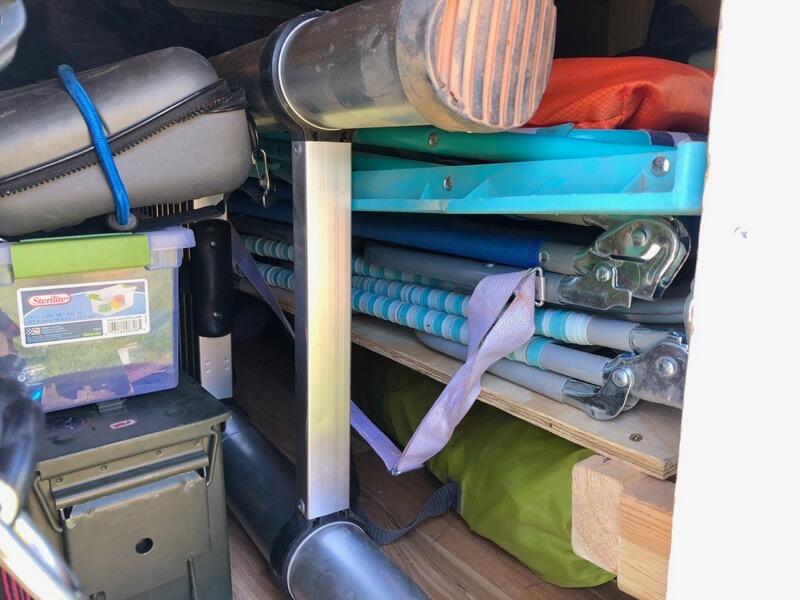
Next to the shelves on the passenger side is a big open area of storage accessed from a smaller slot at the back door. We store a lot of stuff in this area including camp chairs and beach chairs, a portable table, a bocce ball set, a foam roller, our Sunflair Solar Oven, a skateboard and scooter, our telescoping ladder to reach the rooftop deck, our leveling blocks, our water hoses and extension cords and some other miscellaneous tools like hatchets and shovels. You know how we talked about playing Tetris with the bus storage before? This is expert level Tetris. We have tried to organize it better by adding a wooden platform to separate the chairs and adding bungee nets and ties to keep things against the walls.
Open Storage Area
Close Up of Added Shelf

Bungees to Hold Tools on Wall
We covered the storage area floor with the original flooring that came in our bus from the previous owners. It is much nicer than sliding things around on plywood, even if it doesn’t match the color scheme of the rest of our bus.
We also put some netting on the door to hold more random stuff – random plugs and cords and caribeaners and other things Nick thinks we will need one day. Plus Kevin exploding!
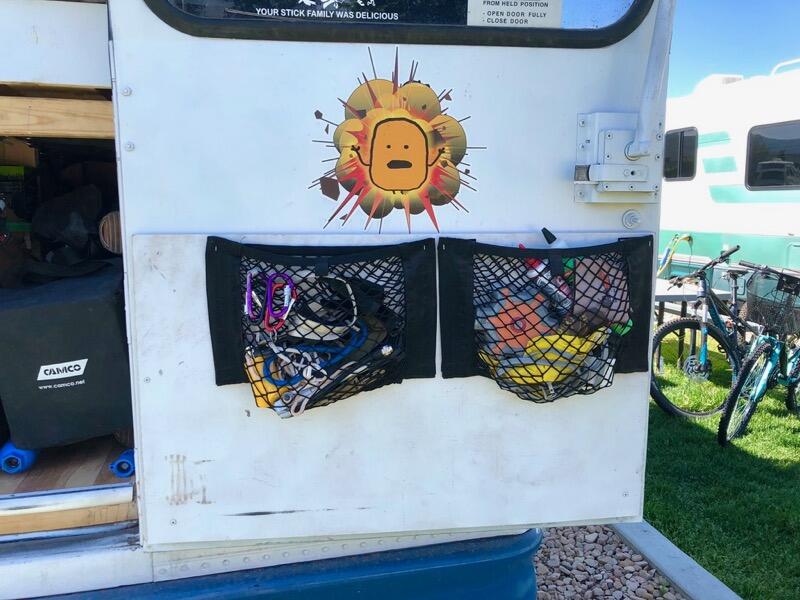
Door Storage
We have a super advanced system to keep the back door open instead of blowing in the wind. It’s a bungee cord attached to the bumper! My one piece of advice though is to always make sure the “trunk” is closed before starting to drive. If you do forget, hopefully you are as lucky as us and only lose one thing in the process!
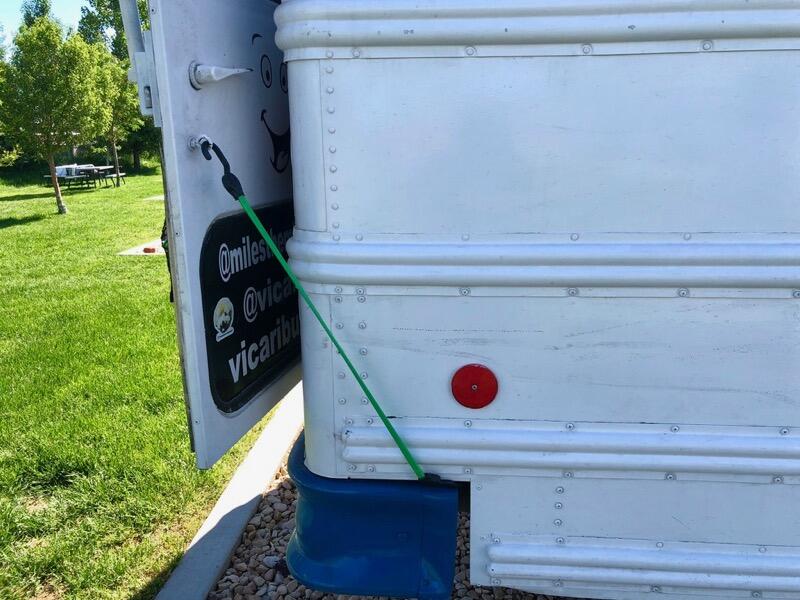
Hodor
To go back to Our Complete Bus Conversion Guide click here.
Completed Conversion Tour
You can see a full set of photos from the completed conversion here, and you can see a video tour of Vicaribus below.
We hope you enjoyed reading this post and now feel more like you too know what it’s like to live in a bus. If you would like to keep feeling this way, subscribe to our email updates and we will let you know when we make new posts for your vicarious pleasures. Just full out the form below and click subscribe!