When deciding the bus life was for us, we knew we would want to do some off grid exploring, but still have some of the comforts of home. We love camping in remote locations without anybody else around and usually those types of places don’t have power outlets laying around. A common solution is to add a generator to your arsenal, but our power needs were going to be fairly low and we didn’t want to deal with the noise, fumes and gas, so we decided to go with the flexibility of a solar power system.
How Much Power?
The first step when planning out your power system is trying to calculate how much power you need. To do this we had to think of every possible item we would be putting in the bus that would draw power and figure out just how much power it drew. Another thing to think about was what could be run on DC power and what needed to be run on AC power. Running things on DC power straight from the battery is slightly more efficient, as the converter doesn’t waste energy converting it, and therefore decreases your overall power needs – every little bit counts. This is what we have running in our bus:
- Chest Fridge (DC): 65W
- MaxxAir Fan (DC): 54W maximum
- 7 recessed LED lights on 4 different switches (DC): 9W each
- Bedroom light fixture with white and color LEDs on two different switches (DC): 6.5W for white, 2-4W for color (the fixture is from Ikea, but then Nick ripped it apart and redid all the wiring to switch it to DC and so that it could have custom colors controlled by our phones, uses 18W unchanged)
- LED light rope (DC): 10-50W depending on setting
- Fan for our Nature’s Head Composting Toilet (DC): 0.4W
- Water Pump (DC): 90W (only while running water)
- Back up Monitor (DC): 6W
- Smoke/CO/Gas Detector (AC): unable to find data
- 1 Power strip that is hardwired to AC system: WiFi Router, AT&T Hotspot, Verizon Hotspot (AC), GoPro battery chargers: 60-100W-ish
- 5 outlets (AC): phone chargers, laptop charges, computer monitor, Roku, bedside fan, LED clock, kitchen appliances, etc: varies based on what is plugged in 2-300W-ish (kitchen appliances like the instant pot and air fryer are only ones with large wattage and we only use them when in full sun and charging)
If my math is even remotely close we should be maxing out at around 5-600W and most of the time using closer to 250-300W. If we had full sun 24/7 we could get away with a much smaller system, but unfortunately the sun sets every night and therefore you need some extra battery space to store energy for times when it is dark or cloudy. For our system we went with a 200Ah Victron LiFePO4 Smart Battery. If you go back to your high school science class you’ll remember that Watts (Power) = Amps x Volts. So to get our Amps you would divide the Watts by the Volts. The DC power system is 12V and the AC power system is 120V. Then somehow math happens and we end up using around 7-10 Amps most of the time. So in theory, our 200 Amp hour battery should last us over 24 hours, and in practice we can go about a day and a half without a charge. They may not sound like a whole lot of time, but our Victron system also gives us the ability to charge from the alternator of the bus while the bus is running, or by plugging into shore power in addition to charging from our solar panels. For our solar panels we went with 2 165W ebay solar panels giving us 330W of charging power. These babies work great and fully charge the bus in no time. In fact, if we are in full sun the panels bring in more energy than we use most of the time, therefore we rarely dip below 100% charge until the sun starts to set and could easily fully charge a much larger battery bank each day.
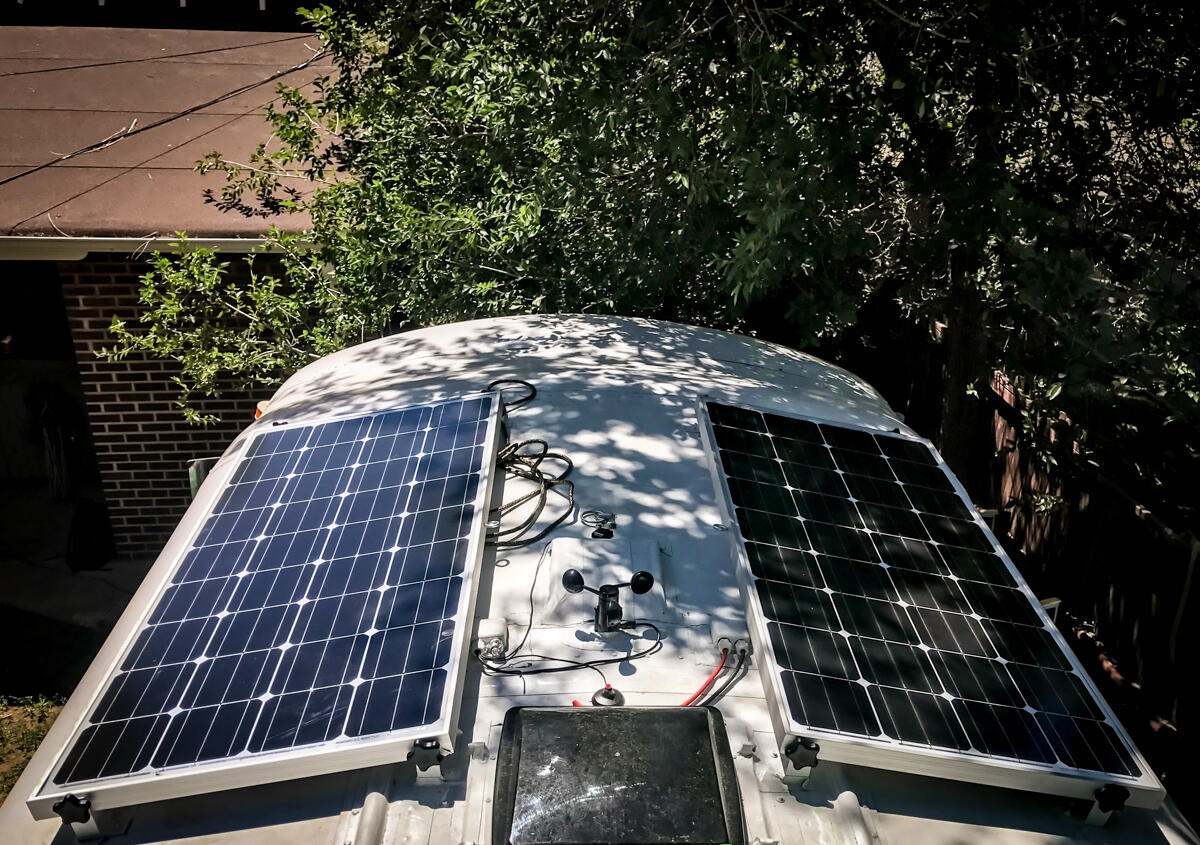
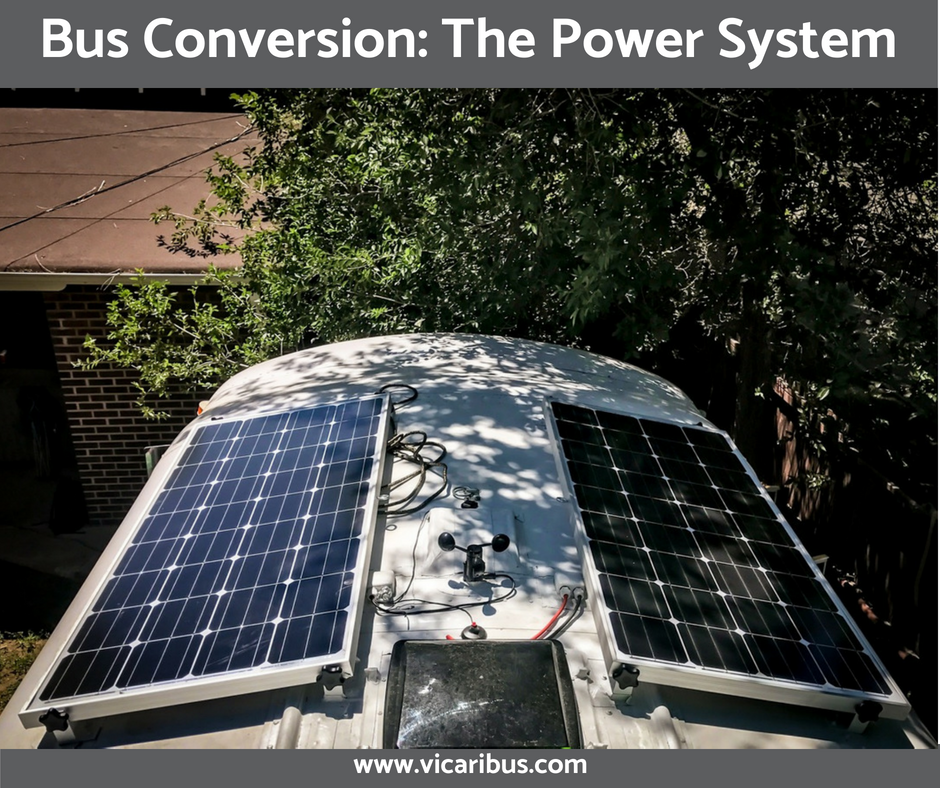
Solar Panels Mounted on the Roof
As mentioned above, we went with the Victron system which includes a 200Ah LiFePO4 Smart Battery, 12/200 Battery Management System, Mutliplus Compact 12/2000 Inverter/Charger, MPPT 100/30 Solar Controller, BMV 702 Battery Monitor, and GCCX Control Panel. As for the battery, lithium (particularly the brand we went with) can be quite expensive, but there are some tremendous advantages to going with a lithium system if you can afford it. Instead of going into a deep dive here, here as an excellent resource covering the pros and cons of lithium vs. lead acid. Nick chose the Victron system because he likes fancy technology and data, and it provided both of those things. It was one of the more expensive parts of our build, but is a fantastic system. Nick did a crap-ton of research and was able to DIY the whole set up after sourcing these parts. To me this happened like fairy magic, but here are some pictures of the process:
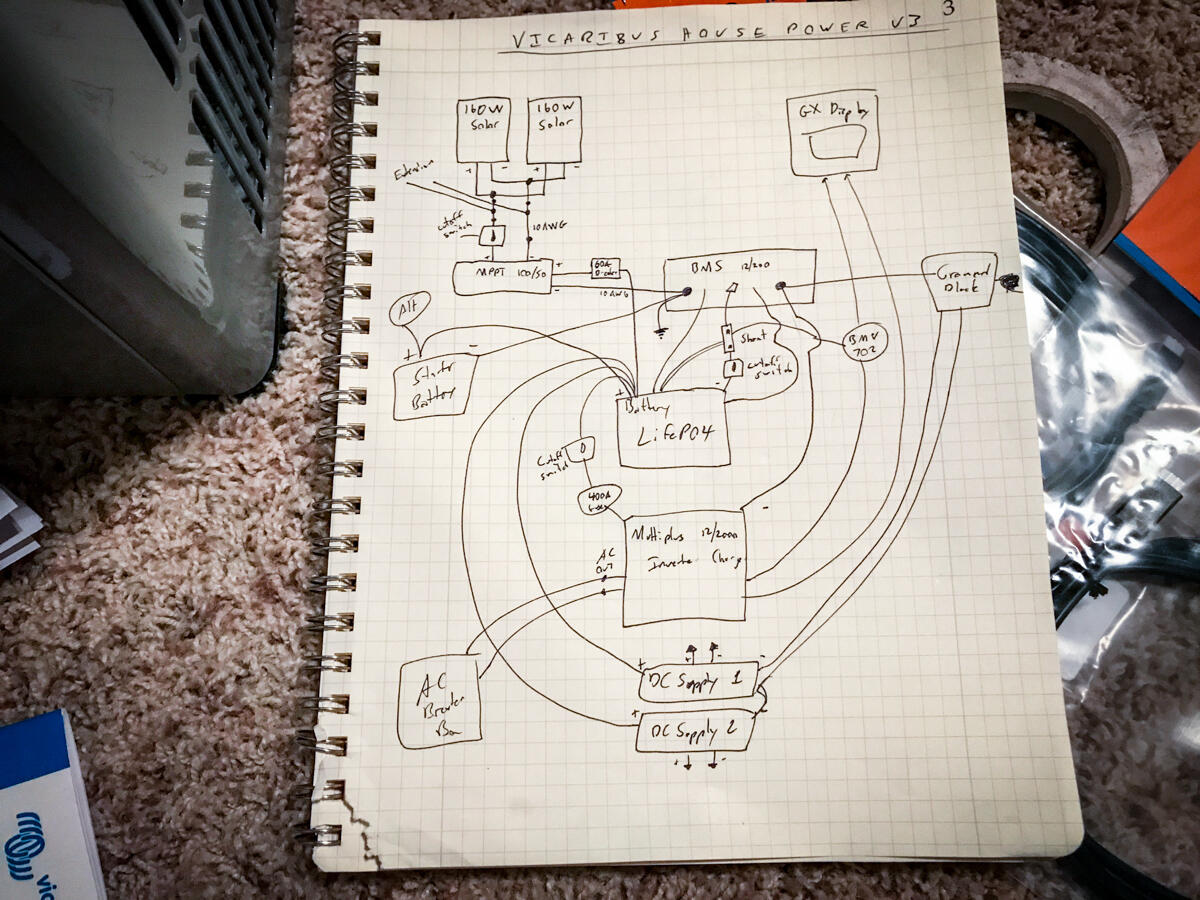
How Everything is Connected
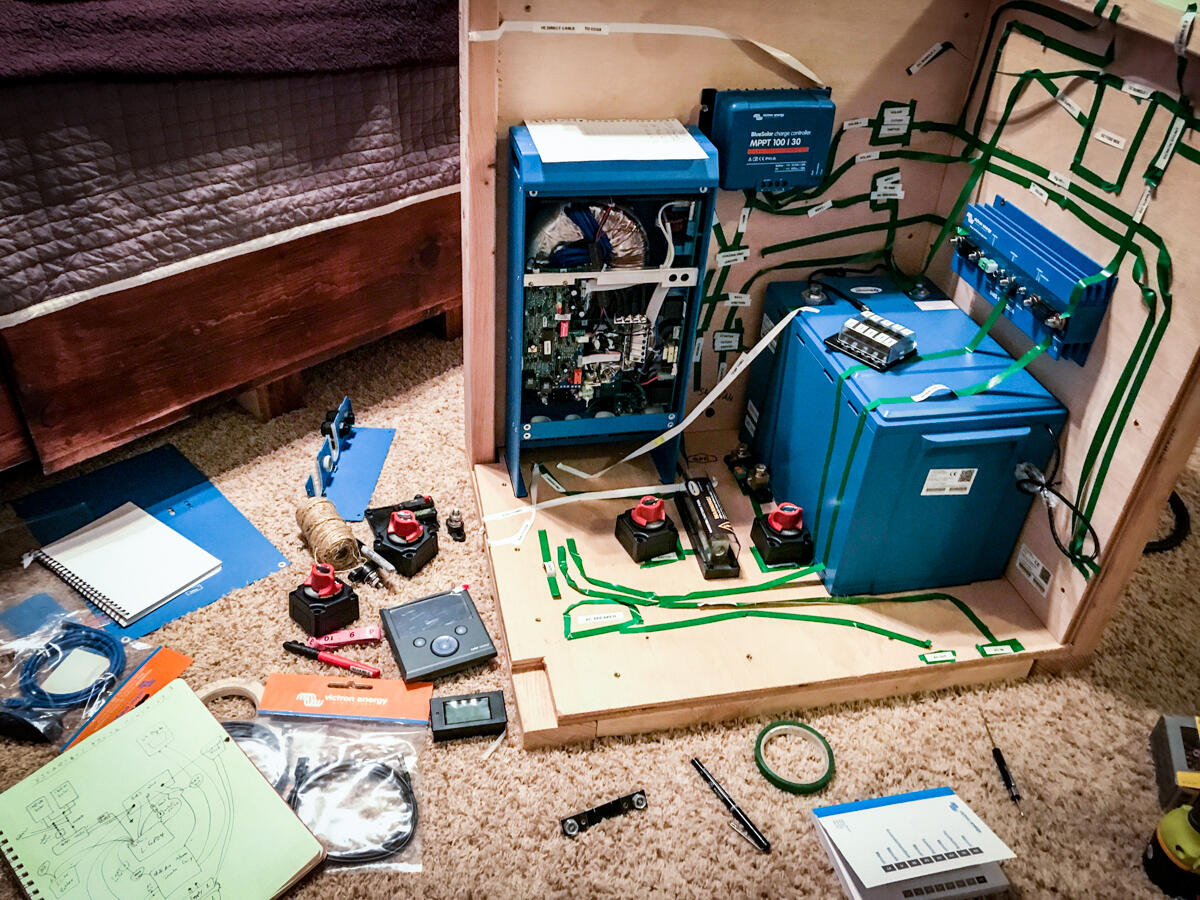
All the Big Pieces in Place Plus Wiring Mapped Out

Everything All Connected and Working!
The giant box in the pictures above lives in the bottom kitchen cabinet immediately behind the driver’s seat. While Nick was working fairy magic on giving us power, I was complaining about how much of my kitchen he was taking away. Little did I know that he planned to take even more away with the control panels and internet things (it’s a good thing I like him), as all of this stuff takes up all of one of the upper kitchen cabinets too. The control panel display and the switches for some of our hard wired DC items live on the side of this cabinet for easy access.
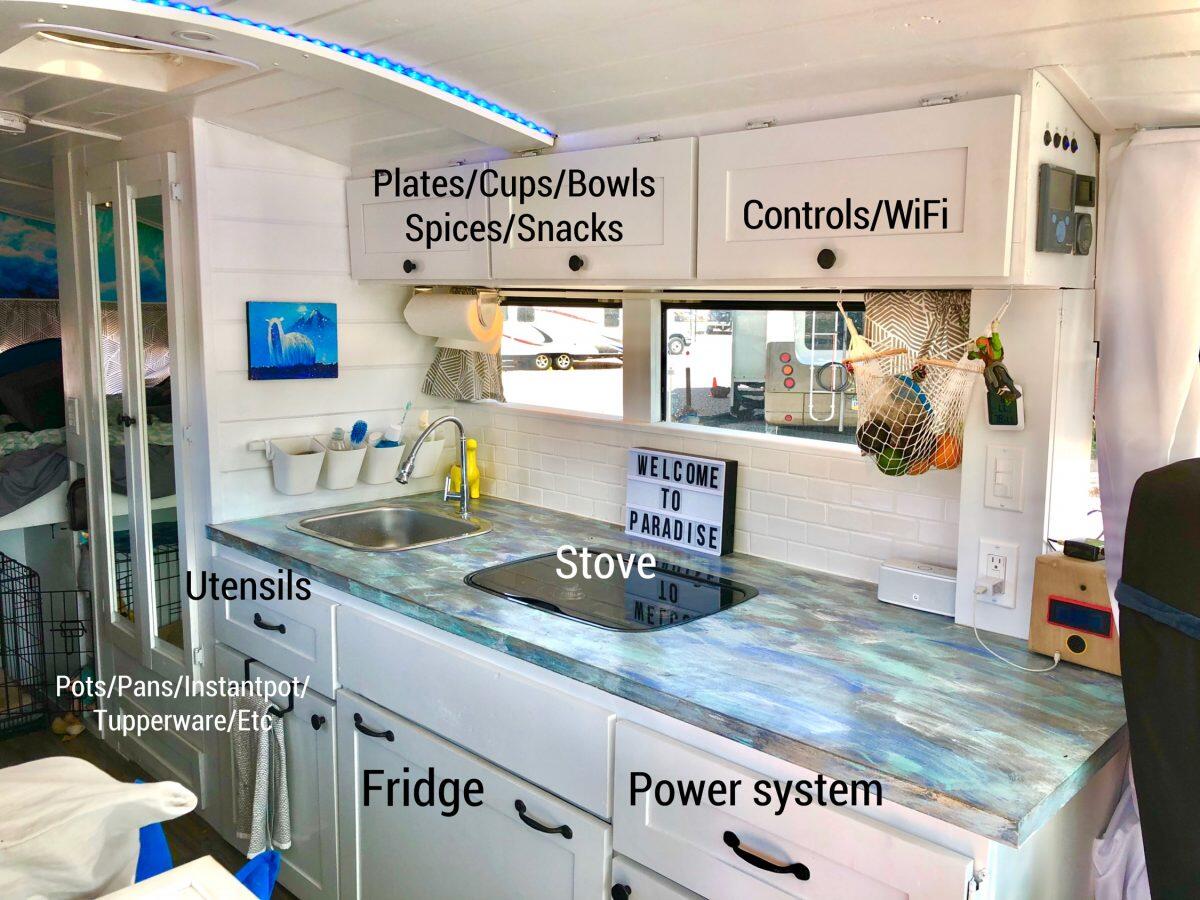
Power System Takes 1/3 of the Kitchen!!!
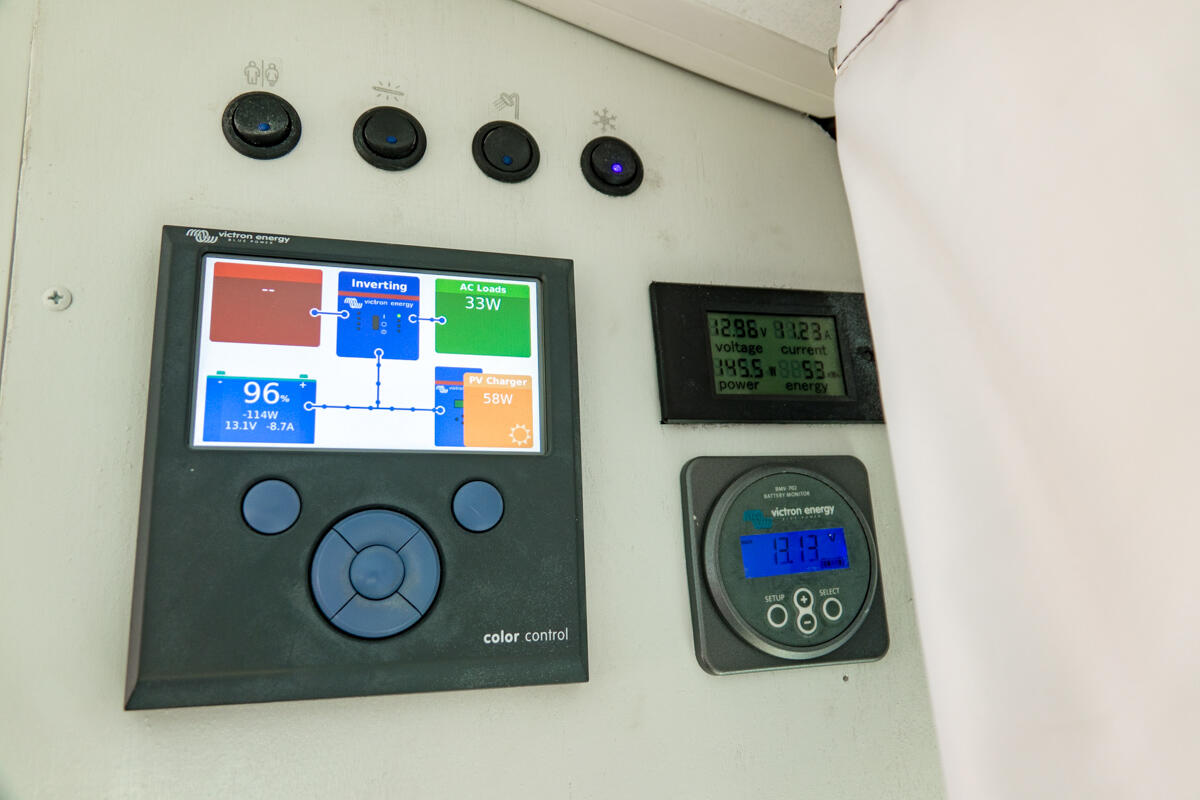
Control Panel, DC System Monitor, Lithium Battery Monitor and 4 Switches (Fridge, Bathroom Fan, Back Up Monitor, Water Pump)
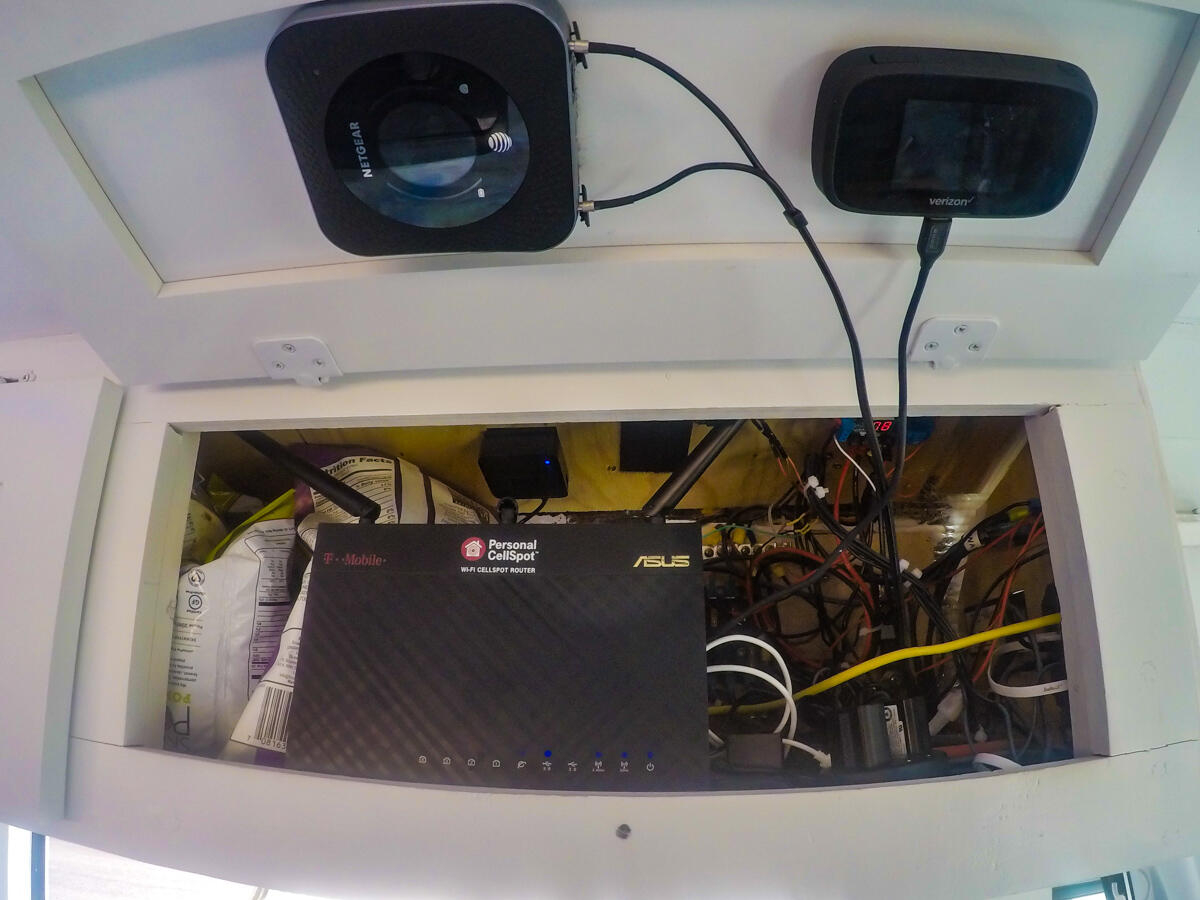
The Less-Pretty Cabinet of Wires, Plugs and Internet Things
Overall we are happy with our power system and it has met all of our needs in our first two months of travel. We have been in mostly sunny places with the longer days of summer so far though. It will be interesting to see what happens as we reach the Pacific Northwest and its stereotypical grey weather. Right now our power supply is limited by the amount of power our battery can store so if we wanted to upgrade that would be what we would change. We don’t see it being a problem though, because if the sun disappears we can always take a scenic drive to juice the battery right back up.
To return to Our Complete Bus Conversion Guide click here.
Completed Conversion Tour
You can see a full set of photos from the completed conversion here, and you can see a video tour of Vicaribus below.
We hope you enjoyed reading this post and now feel more like you too know what it’s like to live in a bus. If you would like to keep feeling this way, subscribe to our email updates and we will let you know when we make new posts for your vicarious pleasures. Just full out the form below and click subscribe!